
Navigation Menus
Proverbs 3:6
“In all your ways acknowledge Him, and He will guide you on the right paths.”
Proverbs 3:6 reminds us that when we acknowledge YAH in everything we do, He guides our paths.
Just as we need direction in our lives, visitors need direction when exploring a website.
When we create a clear navigation menu, we make it easier for people to find their way.
Discussion Question: What happens when someone visits a website that has no clear navigation?

What Is a Navigation Menu?
Have you ever visited a website and couldn't figure out where to go? Maybe you wanted to find the contact page, but there was no clear way to get there.
That is why websites need a navigation menu!
A navigation menu is a collection of links that helps visitors move from one page to another. It is usually located at the top of a website.
Think of it like a road map. Just as road signs help drivers find their destinations, navigation menus help visitors find information.
1. Why Are Navigation Menus Important?
A good navigation menu makes your website:
-
Easy to use: Visitors can quickly find what they need.
-
Organized: Pages are arranged in a logical order.
-
Professional: Your website looks complete and well-designed.
-
User-friendly: Visitors don't have to guess where to click.
2. How Should You Organize Your Menu?
Most websites have a few important pages.
EXAMPLE WEBSITE NAVIGATION
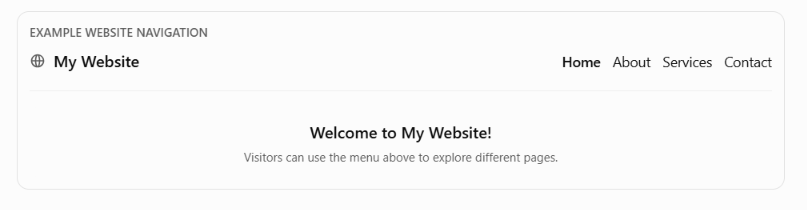
Visitors can use the menu above to explore different pages.
Here is what each page might contain:
-
Home: Introduces your website and welcomes visitors.
-
About: Tells visitors who you are.
-
Services: Explains what you offer.
-
Contact: Shows visitors how to reach you.
You can also create dropdown menus if your website has several related pages.
3. Creating a Navigation Menu in WordPress
Today, we will use WordPress and Divi 5 to organize our pages.
Step 1: Log in to your WordPress dashboard.
Step 2: Click Appearance → Menus if your theme provides that option.
Step 3: Create a new menu and give it a name, such as "Main Menu."
Step 4: Add the pages you created during previous classes.
Step 5: Drag and drop the pages into the order you want.
Step 6: Save your menu and assign it to the appropriate menu location if your theme supports it.
Step 7: Open your website and check that your menu appears correctly. If you are using a Divi 5 Theme Builder header, make sure its Menu module uses the correct menu.
In-Class Activity: Build Your Menu
Today, you will create a navigation menu for the website you have been building.
Activity checklist
0 of 6 completed
Homework: Test Your Website Navigation
Before our next class, test your website.
-
Visit your website as if you were a new visitor.
-
Click every link in your navigation menu.
-
Make sure each link opens the correct page.
-
Check your website on both a computer and a phone.
-
Fix any broken links or confusing menu items.
Send the link to view your website
Remember: A great website is not just about how it looks. It should also be easy for people to use!
Goal for Week 12: By the end of this lesson, you should have a working navigation menu that helps visitors explore your website with ease.