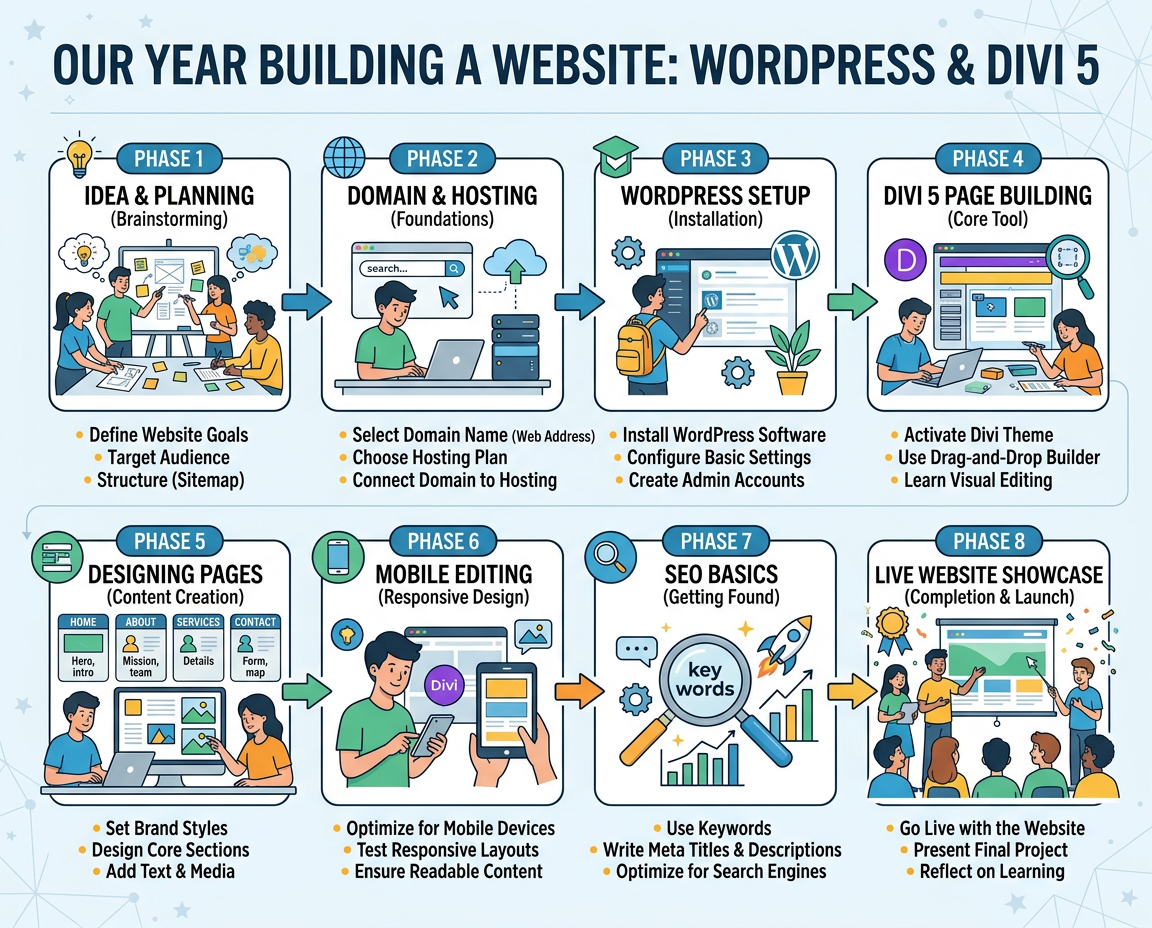
Website Creation
This page is your home base for everything we do in WordPress Website Creation. This is where you will find your weekly lessons and class resources. In this class, you are not just building pages, you are learning how to think like a web designer. You will plan a website, organize content, choose colors and images, use Divi to build your layout, and learn how to make your site look great on computers and phones. Every project you complete will help build your confidence, creativity, and website-building skills.

Before Class: Set Up Your IONOS Hosting
Before our first Website Creation class, you will need to purchase your IONOS Web Hosting plan and choose the domain name you will use for your website.
We will be building a real WordPress website throughout this class, so completing these steps before class begins is very important.
Step 1: Decide What Your Website Will Be About
Before signing up, decide what type of website you would like to create.
Your website can be about almost anything you are interested in, such as:
- A small business
- Photography
- Sports
- Art or graphic design
- Gaming
- Cooking or baking
- Fashion
- Music
- A hobby
- A personal portfolio
- A résumé or future career
- A club or organization
- Another appropriate topic you are interested in
You will work on this website throughout the school year, so choose something you will enjoy creating.
Step 2: Choose a Domain Name
Your domain name is your website’s address on the internet.
For example:
yourname.com
johnsbasketball.com
creativewithsarah.com
Before signing up for IONOS, think of 2 or 3 possible domain names. Your first choice may already be taken.
Keep your domain:
- Short
- Easy to spell
- Easy to remember
- Related to your website topic
- Appropriate for school
Step 3: Sign Up for IONOS Web Hosting
Go to the IONOS signup link provided by your instructor.
Choose the $1 per month Web Hosting plan that I have instructed you to purchase.
Select a 12-month term so that you receive the promotional pricing.
IMPORTANT: Pay attention to the price shown during checkout and make sure you are purchasing the correct hosting package.
Step 4: Choose Your FREE Domain
During the signup process, IONOS will ask you to choose a domain.
DO NOT SKIP THIS STEP.
Your hosting plan includes an eligible domain for the first year, so choose your domain while completing your setup.
Search for the domain name you prepared earlier.
If your first choice is unavailable, try your second or third choice.
Before continuing, double-check the spelling. Your domain should look exactly the way you want it.
Step 5: Do Not Purchase Extra Add-Ons
IONOS may offer additional products or services during checkout.
You do not need extra add-ons for this class unless your instructor specifically tells you to purchase something.
The hosting package provides what we need to begin building your WordPress website.
Step 6: Create Your IONOS Account
A parent or guardian may need to help you complete the purchase and create the account.
Make sure you use an email address that you can access.
Save your IONOS login information somewhere safe. You will need it during class.
Do not share your password with other students.
Step 7: Complete Your Purchase
Before completing your order, check:
✓ You selected the correct Web Hosting plan
✓ You selected the correct promotional term
✓ You chose your domain name
✓ Your domain is spelled correctly
✓ You did not accidentally add unnecessary services
✓ You know the email address used for the account
✓ You saved your IONOS login information
Then complete your purchase.
Step 8: Email Me When You Are Finished
Once your IONOS account and hosting plan are set up, email me to let me know you have completed the process.
I will request the access I need to prepare the backend of your website.
Please complete this BEFORE our first Website Creation class so that we can begin working on your website right away.
Bring to Class
On the first day, make sure you have:
✓ Your laptop
✓ Your laptop charger
✓ Your IONOS login email
✓ Your IONOS password
✓ Your domain name
✓ Your website idea
Do not begin installing WordPress or building your website on your own. We will do that together in class!


Website Help!
When building in Divi
-
Start with the page structure first.
-
Build the header, content, and footer in order.
-
Use spacing to make things look neat.
-
Keep buttons easy to see.
-
Use simple design instead of too many effects.
-
Reuse styles so the site looks consistent.
-
Always check tablet and phone views.
Good website habits
-
Plan before you build.
-
Keep text short and clear.
-
Use real photos when possible.
-
Make sure links work.
-
Check spelling and grammar.
-
Ask: “Is this page easy to understand?”
Advice
-
Start with a plan.
-
Build one page at a time.
-
Keep your design clean and simple.
-
Use the same colors, fonts, and spacing.
-
Make sure your site works on mobile.
-
Add helpful images and clear text.
-
Save often and preview your work.
-
Keep improving as you go.