Camera Basics: The Exposure Triangle
Luke 11:34
“Your eye is the lamp of the body…”

What Is Exposure?
When you take a photograph, your camera uses light to create the image. The amount of light that reaches your camera determines whether your photo looks too bright, too dark, or just right.
This is called exposure.
Think about your eyes. When you walk into a dark room, your eyes adjust so you can see. When you step outside into bright sunlight, they adjust again. Your camera does something similar, but YOU can control how it responds to light.
Luke 11:34 reminds us how important light is to what we see. As photographers, learning to understand and control light is one of our most important skills.
The Exposure Triangle
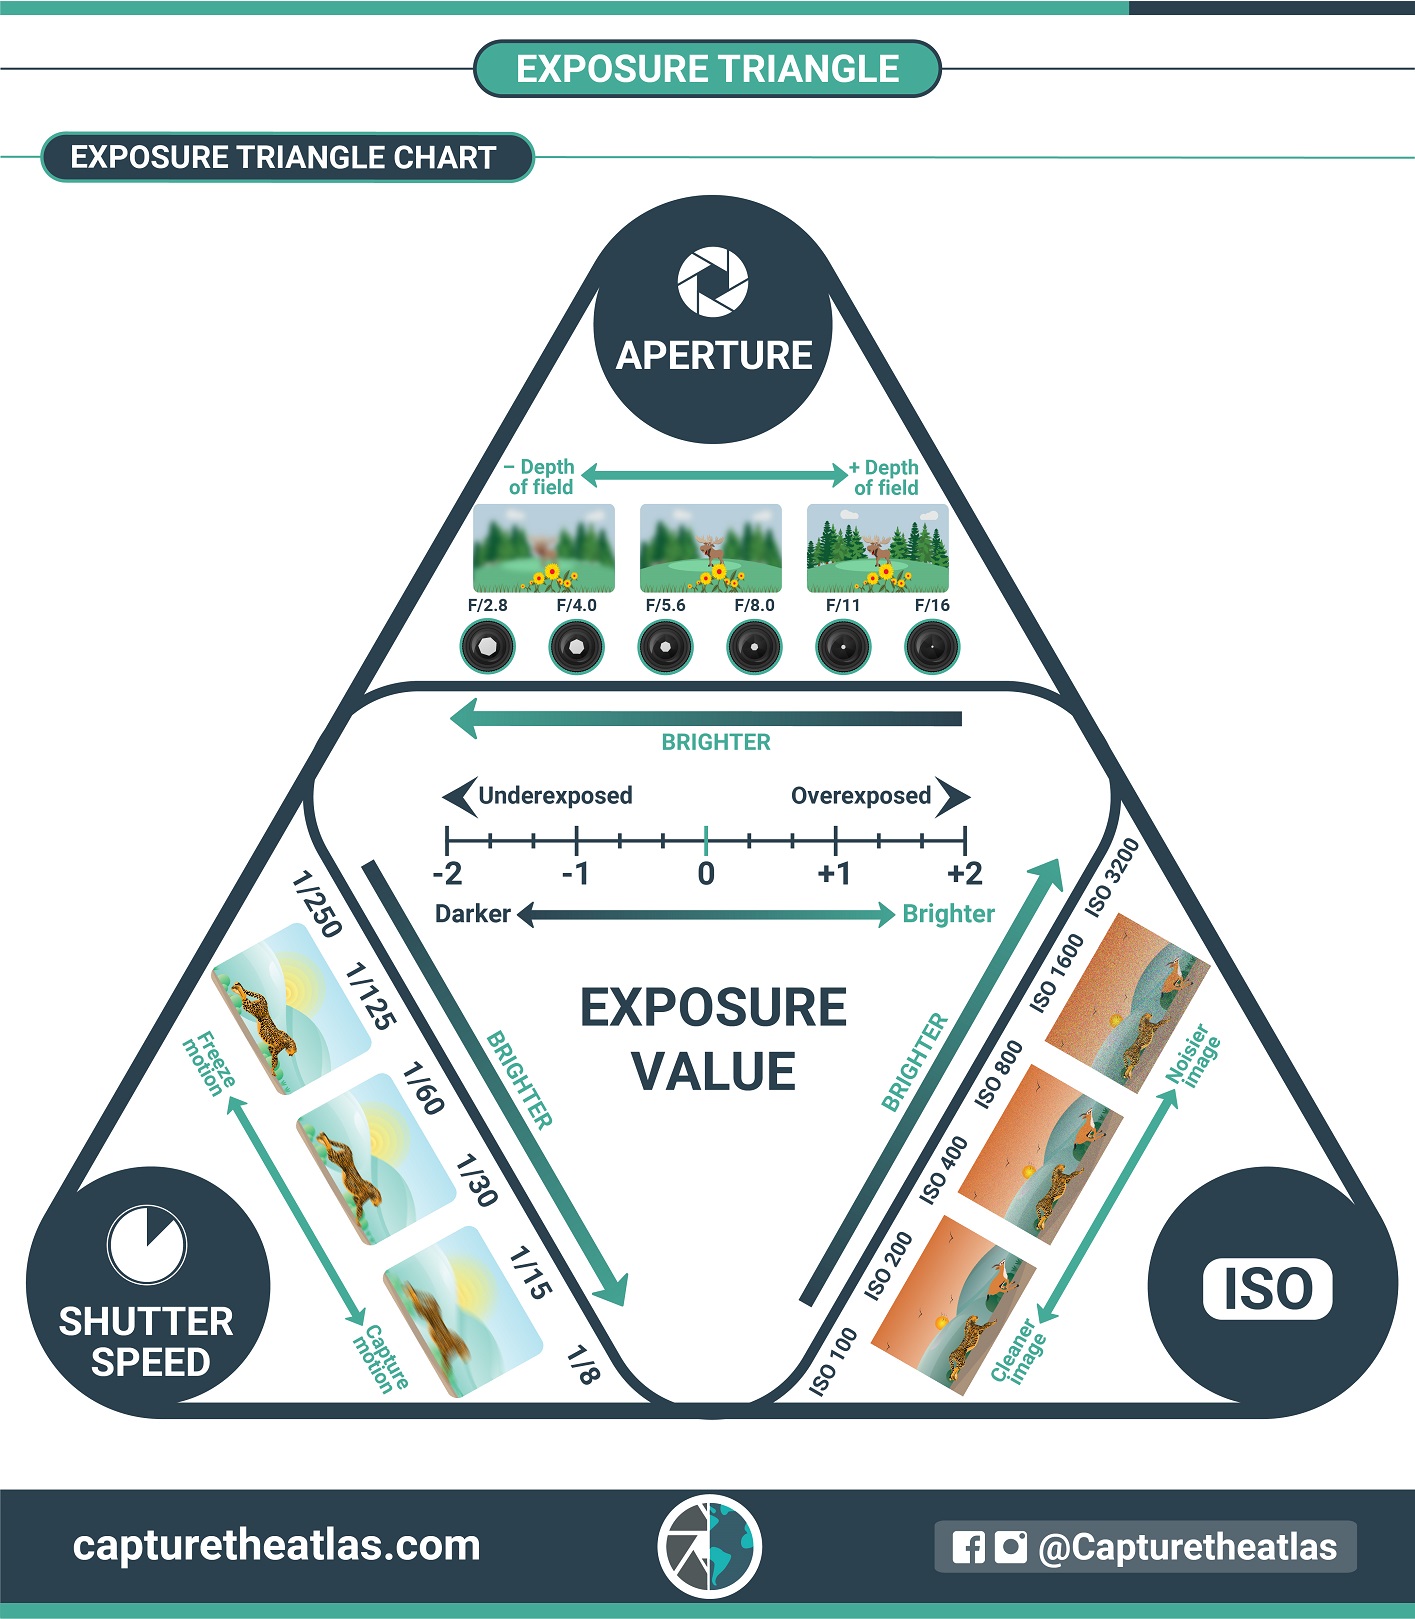
There are three main camera settings that control exposure:
- Aperture: How much light enters
Aperture is the opening inside your lens. Think of it like the pupil of your eye.
- Lower f-number, such as f/2.8, means a larger opening and more light.
- Higher f-number, such as f/11, means a smaller opening and less light.
Aperture also affects how much of your photograph appears in focus.
f/2.8 = more light + blurrier background
f/11 = less light + more of the scene in focus
ISO: How sensitive the camera is to light
ISO helps you adjust the brightness of your photograph.
A low ISO, such as ISO 100, is great when you have plenty of light.
A higher ISO, such as ISO 1600, can help when the environment is darker.
But there is a tradeoff. Raising your ISO too high can add noise or grain to your photograph.
Think:
Low ISO = cleaner image, needs more light
High ISO = brighter image, possibly more grain
They Work Together!
Aperture, shutter speed, and ISO work together to create your exposure. If you change one setting, you may need to change another.
For example, if your photo is too dark, you could:
- Open your aperture
- Use a slower shutter speed
- Raise your ISO
If your photo is too bright, you could do the opposite.
The goal is not simply to make every photograph bright. The goal is to learn how to control the light intentionally.
Class Activity
In-Class Activity: Bright, Dark, Balanced
Choose one subject and photograph the same subject several times.
First, purposely make the photograph too bright.
Next, change your settings so the photograph is too dark.
Finally, adjust your aperture, shutter speed, and/or ISO until you create a balanced exposure.
As you work, pay attention to what happens each time you change a setting. Don't worry about getting everything perfect today. The goal is to experiment and understand what your camera is doing.
Homework
Three Exposures
Take 3 photographs of the same subject or scene:
- Bright Photo: Intentionally overexposed
- Dark Photo: Intentionally underexposed
- Balanced Photo: Properly exposed
For each photograph, write down the aperture, shutter speed, and ISO you used.
Submit all 3 photos with their camera settings.
The goal this week is to begin moving away from simply letting the camera make every decision. You are learning how to control light and create the photograph you want.